In order to use Bookings, you first need to create an event type. Let's find out how to create an event type on the Cocopipe App.
Creating an event for Bookings
Navigate to the Bookings page. Then, click on the "New Event Type" button.
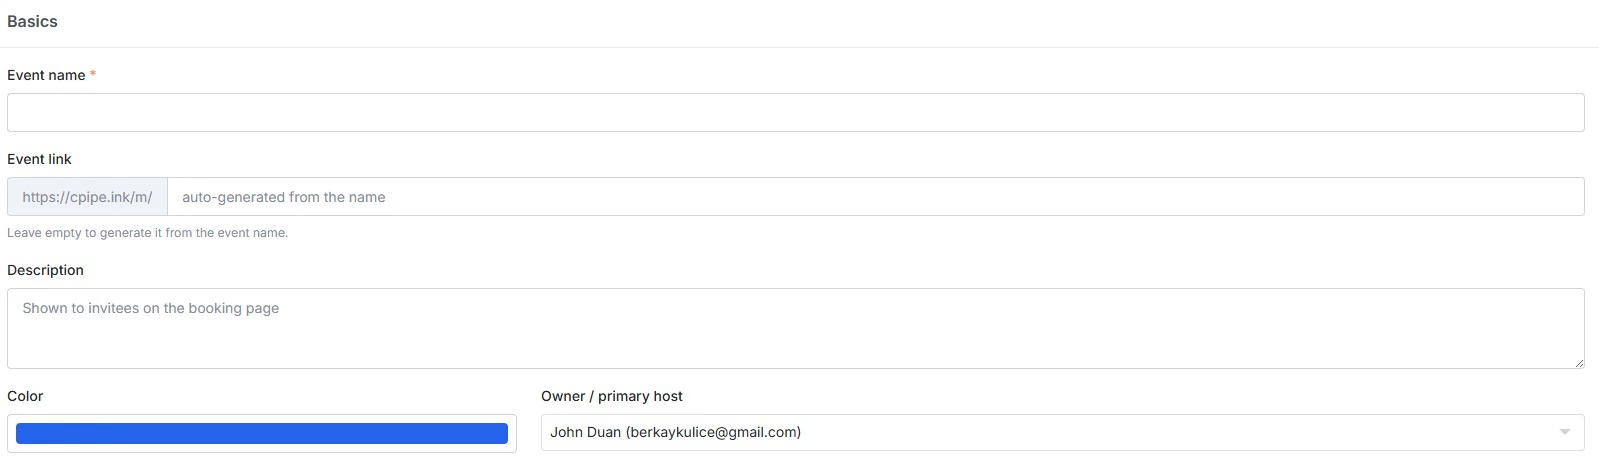
On the Basics section, you can adjust the following:
Event Name: The reason of the meeting type. It may be Onboarding, Introduction, etc.
Event Link: Event Link: Cocopipe provides custom short links for Bookings. However, you can also customize your short link's slug.
Description: You can add a description for your events. You can include meeting requirements, preparation notes, etc.
Color: Choose the color in which your bookings from this event will be displayed on your calendar.
Duration of events

On the duration and location section, you can adjust the following:
Duration: How many minutes the appointment will take.
Start Time Increments: How often a start time is offered.
Location: Choose the meeting platform or in-person location for your event. If you integrated your email, the appoinements will be displayed on your calendar automatically.
If you choose Google Meet as a location type, a Google Meet link will be created automatically after each confirmed appointment from the event.
Location Details: Just in case you want to share more details about your meeting location.
Customization of invite questions
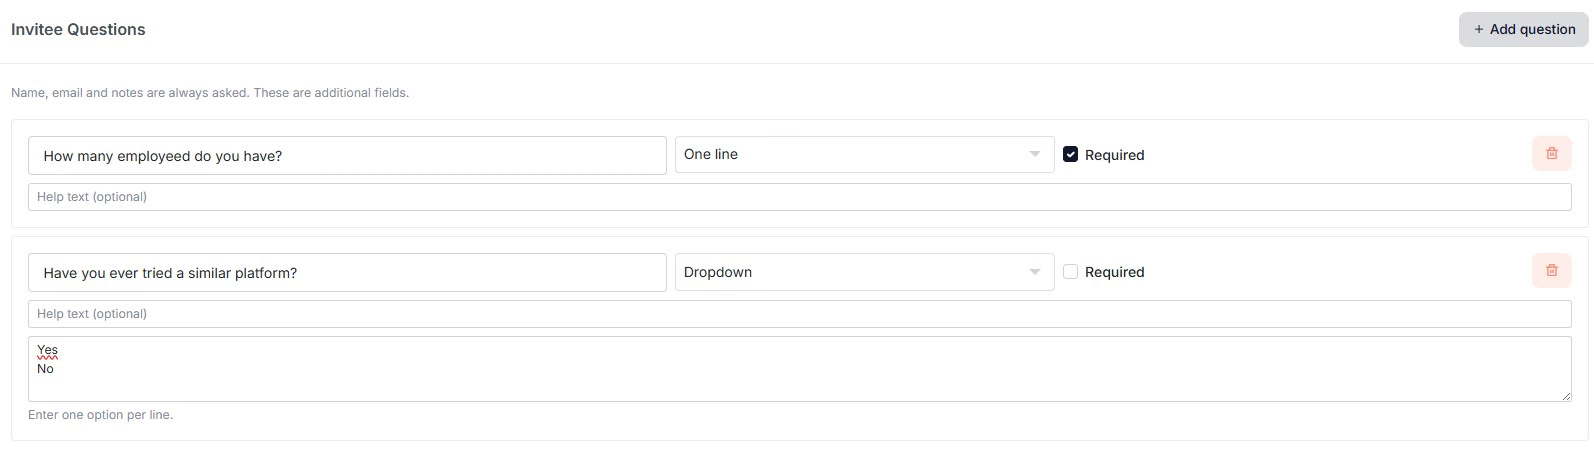
You can customize the questions that asked on the booking screen. The fields that supported are:
Textfields
Richtext
Dropdowns
Radio buttons
Checkboxes
Phone
Email
URL
Number
Full Name and email are required and cannot be edited or customized.
Bookings CRM integration
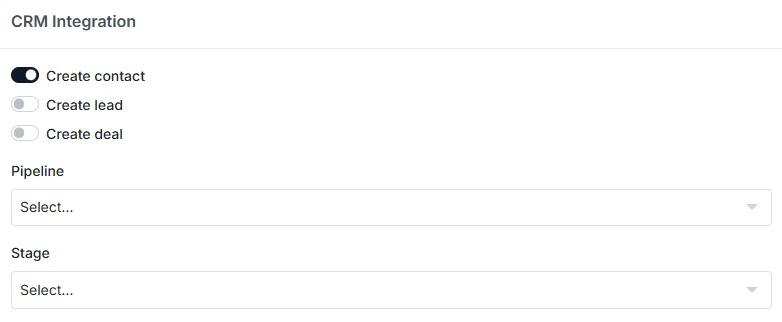
If you want to create new record for your CRM after each appoinment, you can adjust it on the CRM Integration section. Just toggle on the ones that you want to create. For Deals, you can pick a pipeline and stage as well.